
How to Plan Pool Equipment Access for Future Repairs
A pool pump can fit neatly beside a fence and still leave no room to replace it. When you plan a new pool, service space matters as much as the equipment itself. Good pool equipment access lets a technician handle routine care without squeezing behind pipes, then remove a failed heater or filter without dismantling your backyard.
The best time to solve those problems is while the pad, gate, deck, and landscaping are still on the drawing. Start with the space a person needs to work.
Pool equipment access starts at the pad
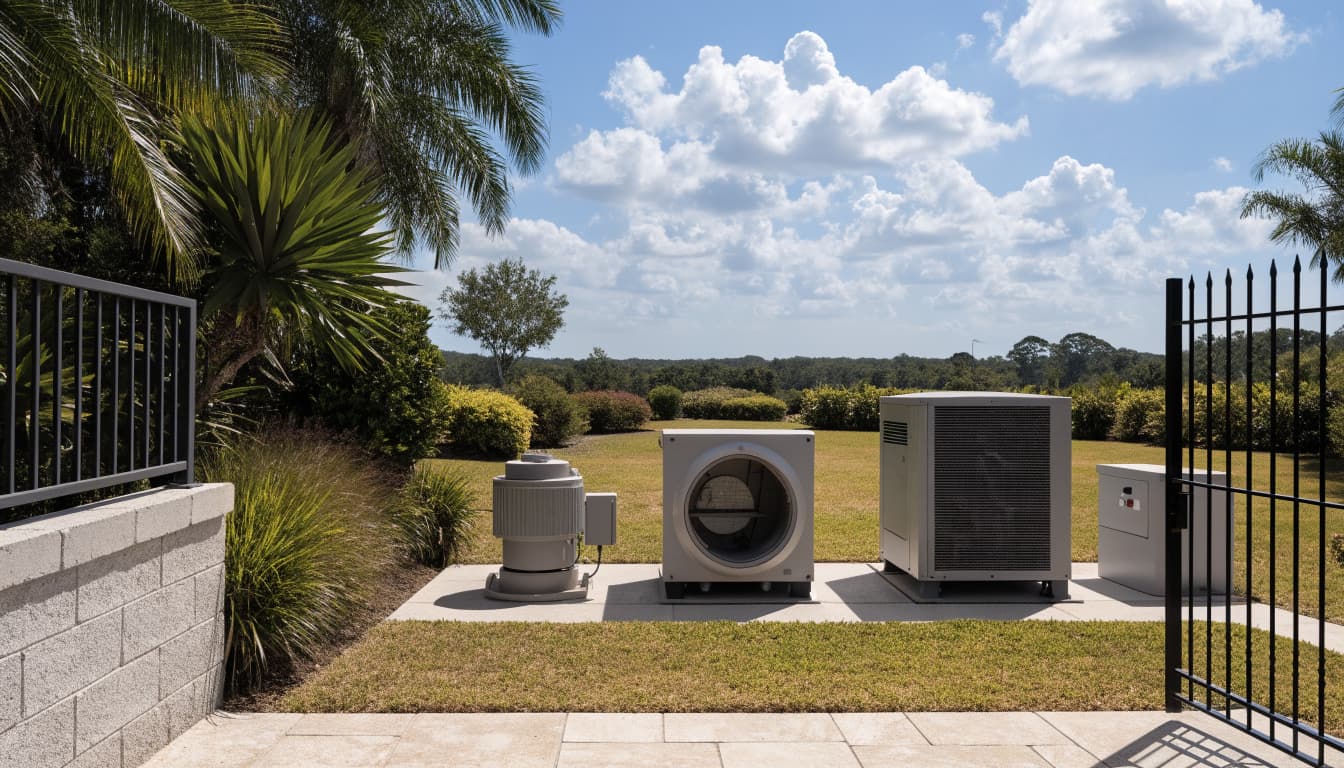
An equipment pad needs room for the equipment and the work around it. A tight row of components may look tidy in a plan, but pumps, filters, heaters, and valves have different service points.
Leave working room, not leftover space
A technician may need to open a pump lid, reach a drain plug, remove a motor, or inspect a union. Cartridge filters need room above the tank to lift out their cartridges. A heater needs access to its service panels and the clearances its manufacturer specifies.
Walk through those tasks with your builder using the equipment models you expect to install. Keep valves visible and reachable without leaning over electrical components. Check the manuals for required service clearances before the plumbing and pad positions are set. There is no useful universal clearance that fits every pump, filter, and heater.
Keep room for a different unit later
Your eventual replacement may have a different shape or service-panel location. Ask whether the planned plumbing leaves a practical way to disconnect and remove each major component.
Avoid boxing the pad in with permanent masonry or closely spaced decorative walls. If a screen or enclosure surrounds it, confirm that its opening and roof allow equipment to be serviced and removed. A neat enclosure offers little value if replacing the filter requires cutting it apart.
Make routine maintenance comfortable and safe
Small access problems show up long before a major repair. If opening a filter or checking a pump means moving furniture and pushing through shrubs, ordinary care becomes harder to keep up with.
Put frequent tasks within easy reach
Your pool professional should be able to see the pump basket, filter pressure gauge, valves, and controls from a stable standing position. Leave space to set down a filter lid or cleaning tools without blocking the walkway.
Think about hose use, too. The person cleaning a cartridge filter needs a suitable place to work and handle rinse water according to local requirements. Keep the route between the pad and that work area clear, rather than counting on someone carrying a wet cartridge around the house.
Give controls their own usable space
Automation panels and timers should be readable and accessible without standing in landscaping or reaching across hot equipment. Position controls with the builder and electrician so their covers can open fully.
Future upgrades may add components such as automation or salt chlorination. San Juan Pools & Spas offers pool equipment installation and renovation services, including heating and automation options. Discussing those possibilities during design can help preserve sensible space around the equipment you install now.
Plan the full route for equipment replacement
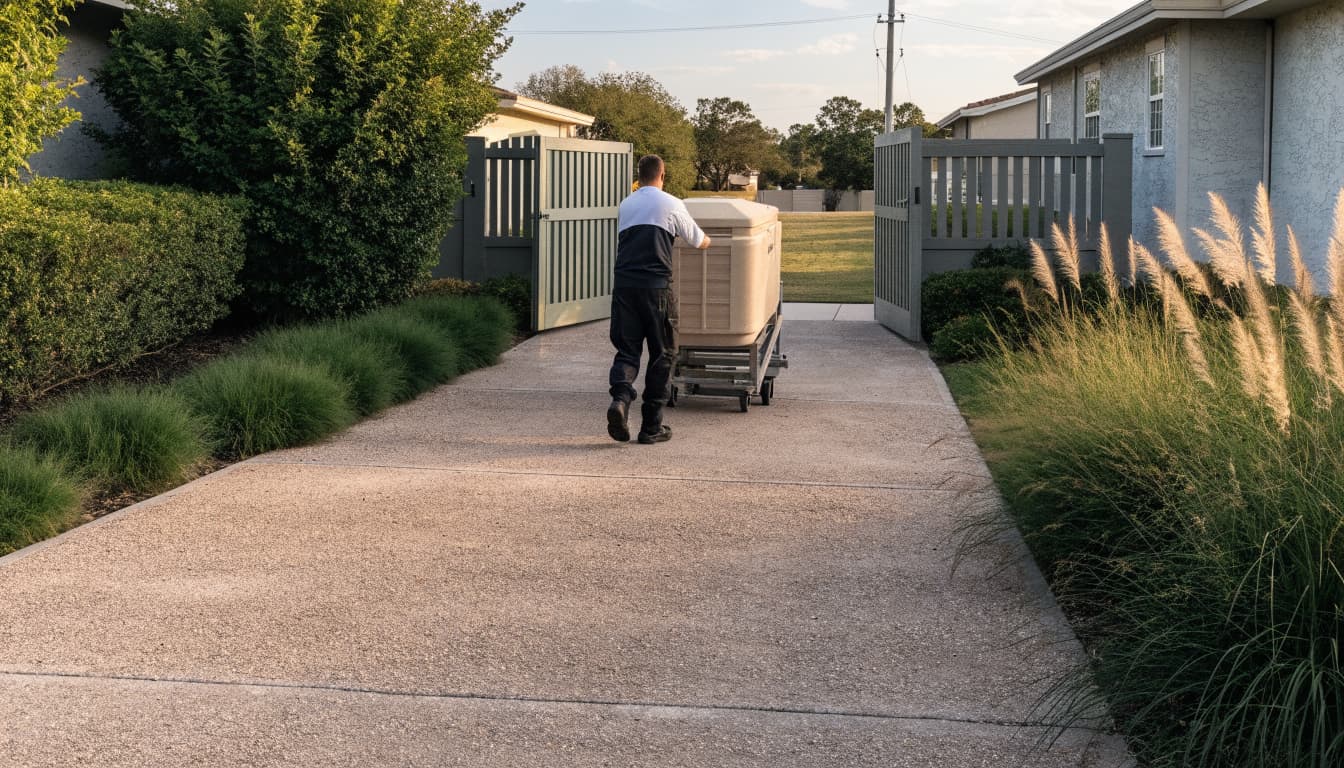
A clear pad won't solve a replacement problem if a large filter can't pass through the side gate. Trace a continuous path between the equipment and the place a technician can load or unload it.
Check openings and turns
Look at the gate's clear opening , not only its advertised size. Hinges, posts, latches, and a gate that doesn't swing fully open all reduce usable room. If the route passes through a screen-enclosure door, check that opening as well.
Next, look for sharp turns beside an air-conditioning unit, steps, or a narrow gap between walls. Bulky equipment needs space to turn, even when it fits through every opening individually. Compare the route with the dimensions of the selected equipment, then ask your builder how a replacement would leave the yard.
Make the path usable over time
A firm, reasonably level path is easier to use than loose stone or ground that stays soggy. It may also allow technicians to use appropriate moving equipment, depending on the job. Keep irrigation heads, low branches, and stored pool supplies out of the way.
Remember the space beyond the gate. A delivery vehicle needs a practical stopping point, and workers need permission to use the route. If access depends on a neighbor's yard or on moving a heavy planter, the plan needs another look.
A removable gate panel can help with replacement only if the path beyond it remains clear.
Protect the pad without trapping water or heat
Southwest Florida weather makes pad placement especially important. Rain can turn a low spot into a puddle, while an overly enclosed equipment area can restrict airflow.
Direct water away from service areas
Ask how the finished deck, yard, and pad will drain during heavy rain. Avoid placing the pad where runoff collects or where a downspout empties onto equipment. Also consider where water will go when someone drains a filter or services plumbing.
Keep access surfaces stable and free of standing water. Drainage plans must follow applicable local requirements; don't assume discharge can run onto a neighbor's property or across a walkway. Check the final grading after hardscape and landscaping work, since those changes can alter the route water takes.
Match shelter to the equipment
Shade or a suitable weather cover may make controls easier to use and help protect equipment. However, a cover must not block required access or airflow. Heat pumps need space for air movement, and gas heaters have their own combustion-air and venting requirements.
Follow the installation manual for the exact model. Before adding a roof, privacy screen, or storage enclosure later, check whether it changes those conditions. Leave room to open panels and inspect the unit without removing the structure.
Keep electrical access part of the design
Pool equipment brings water and electricity close together, so the electrical plan deserves more than an empty patch of wall. A licensed electrician should place panels, disconnects, wiring, and protective devices according to the equipment instructions and applicable local codes.
Preserve access to panels and shutoffs
Electrical covers need room to open, and technicians need a safe place to stand while working. Don't put a storage shelf, dense hedge, or permanently mounted feature directly in front of them. Equipment labels and shutoffs should remain identifiable after the yard is finished.
If the plan includes a heater, automation, or future upgrade, tell the builder and electrician early. They can review the equipment's electrical requirements before the pad and surrounding surfaces limit their options.
Keep later changes out of the way
Homeowners often add lights, irrigation, screens, or outdoor kitchens after pool construction. Route those additions with the equipment area in mind. New conduits and posts shouldn't cross a service path or prevent a panel from opening.
Never treat an extension cord as a permanent answer to poor equipment placement. Electrical work and any changes near pool equipment belong with qualified professionals.
Review access during design and construction
The pool plan may show where equipment sits, yet leave out how anyone reaches it. Ask for the gate, path, pad, nearby walls, and proposed landscaping to appear together on the site plan.
Review the actual equipment lineup
Get the proposed pump, filter, heater, and control models before finalizing their positions. Manufacturer instructions provide the clearances for those units; your builder can compare them with the space available. If a model changes during construction, revisit its footprint, airflow, plumbing connections, and removal route.
San Juan Pools & Spas' pool planning and construction process lists equipment installation and electrical work as separate stages. Access decisions belong earlier, while there is still room to adjust the layout without undoing finished work.
Walk the route before finishes go in
Stand where the gate, screen door, and equipment pad will be. Picture a worker opening each service panel and moving the largest unit out. This on-site review can reveal a tight turn that looks harmless on paper.
Repeat the check before permanent fencing, paving, and planting are complete. A small change to a path or gate is easier to discuss while those features are still being installed.
Common layout mistakes to avoid
Most access trouble comes from choices that seem minor when viewed one at a time. Watch for these combinations:
- A filter sits beneath a low shelf, leaving no room to lift out its cartridge.
- A privacy wall hides the equipment but blocks a heater panel or required airflow.
- A gate admits a person easily but leaves no usable route for a replacement unit.
- Shrubs are planted for their current size, with no room for mature growth or pruning.
- Irrigation, downspouts, or deck runoff leave the technician standing in water.
- Pool supplies accumulate on the only path to the pad.
The fix isn't always a larger yard. It may be a different equipment arrangement, a better gate position, or landscaping placed farther from the service area. Check the complete route instead of solving each obstacle in isolation.
A pool equipment access planning checklist
Bring this short list to your design review, then revisit it when the equipment models and yard finishes are chosen.
- Confirm service and ventilation clearances in each manufacturer's instructions and check applicable local codes.
- Check access to pump lids, filter cartridges, heater panels, valves, controls, and electrical shutoffs.
- Trace a continuous removal route through gates, turns, steps, and screen-enclosure openings.
- Keep the pad and path well drained, stable underfoot, and clear of stored items.
- Review shelter, fencing, and mature landscaping for future obstructions.
- Recheck the layout if the equipment lineup or site plan changes.
Key takeaways
Plan for two kinds of access: the room needed to work at the pad and the route needed to remove equipment. Both should suit the selected models, not a generic drawing.
Then protect that space as the backyard takes shape. Gates, planting, drainage, and later additions can change whether a good equipment layout stays serviceable.
Frequently asked questions
How much space should I leave around pool equipment?
Use the installation and service instructions for your selected pump, filter, heater, and controls. Requirements vary by model and by which side needs service. Ask your builder to check the full arrangement against those instructions and applicable local codes rather than relying on one measurement for the whole pad.
Can pool equipment go behind a privacy screen?
It can, if the screen preserves required airflow, working clearances, and a practical removal route. Check the heater requirements carefully before approving a roof or close-fitting walls. Also make sure any gate or removable section will remain usable after landscaping matures.
When should I raise access concerns with my builder?
Bring them up during initial site planning, before the equipment pad, fencing, and deck layout are finalized. Review the plan again when specific equipment models are chosen and before permanent yard finishes close off the route.
Conclusion
A tidy equipment corner can still become a costly obstacle if no one can work there or move a failed unit out. Plan the pad and the path together , using the chosen equipment's requirements and the finished yard layout.
That early check helps keep routine care practical and future repairs from disrupting the backyard you built to enjoy.