
How to Plan LED Pool Lighting in Cape Coral
A Cape Coral pool can look inviting in the afternoon and feel unfinished after sunset if the lighting plan comes too late. LED pool lighting gives you control over visibility, mood, and energy use, but the result depends on placement as much as the fixtures themselves.
The best time to plan lighting is before construction or a major renovation, when conduit, niches, wiring, controls, and water features are still accessible. Existing pools still have good options, including fixture replacement, surface-mounted lights, and upgraded controls. Start with how you want to use the backyard, then build the lighting plan around those activities.
Start with how you use the pool after dark
Pool lighting should support the way your household spends time outdoors. A family that swims after dinner needs clear visibility inside the pool. A homeowner who mainly entertains may care more about the spa, sun shelf, deck, and nearby seating areas.
Walk through the backyard after sunset and identify the areas that need attention. Look at the pool entry, steps, benches, tanning ledge, spa spillway, waterfalls, and the path between the house and pool. Also check seating, outdoor kitchens, fire features, and doors that guests use.
Underwater lights illuminate the water, but they don't automatically make the entire pool deck safe. Separate low-voltage landscape or path lighting may help guests see changes in elevation, steps, and the edge of the deck. Keep these lights soft enough that they don't create reflections or glare across the water.
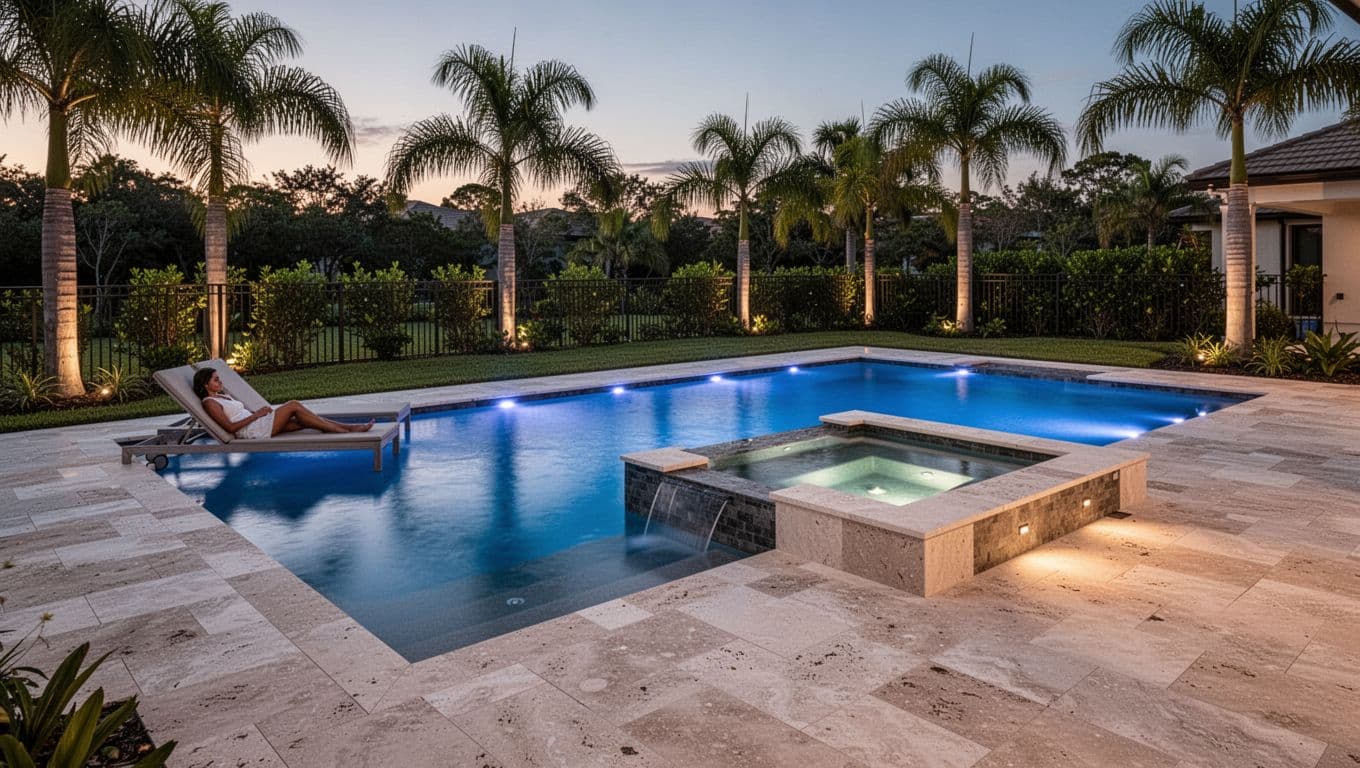
A useful plan usually includes three layers:
- Underwater lights provide visibility for swimming and define the pool's shape.
- Feature lighting draws attention to waterfalls, fountains, spillways, and fire bowls.
- Deck and landscape lights improve movement around the pool without competing with the water.
This layered approach prevents the common mistake of making the pool bright while leaving the surrounding seating and walkways too dark.
Map LED pool lighting zones before construction
New pool construction gives you the most flexibility. Before excavation or plumbing begins, mark every location where wiring, conduit, junction boxes, and controls may be needed. Changes are harder and more expensive after the deck, tile, and interior finish are complete.
Your pool plan should show the location of each underwater fixture, the spa lights, the lighting for shelves and steps, and any lights inside water features. It should also identify the transformer and control location. Place equipment where technicians can access it without disturbing finished surfaces.

Set fixture positions for even coverage
Pool shape matters more than a simple fixture count. A narrow rectangular pool may need a different layout than a freeform pool with curves, benches, and a raised spa. Light placement should account for the pool's length, depth changes, interior finish, and the beam spread of the selected fixture.
Many designs place lights on the wall opposite the main viewing area, so the fixtures shine away from the house and reduce glare. However, the correct position depends on the pool structure and the manufacturer's installation requirements. Your builder should review the view from the house, patio, and primary seating area before finalizing the layout.
Avoid placing every light on one side of a large or irregular pool. That approach can create bright spots near the fixtures and darker areas elsewhere. Even coverage usually looks better than maximum brightness.
Separate the pool, spa, and features
A raised spa often needs its own light because the wall, spillway, and higher water level create a separate visual zone. Sun shelves and tanning ledges may also benefit from dedicated illumination, especially if swimmers enter the pool there.
Waterfalls and deck jets need careful placement. A light hidden near the source can make moving water visible without shining directly into the eyes of people sitting nearby. For a fire bowl, keep the flame and underwater light balanced so neither feature overwhelms the other.
Ask for a nighttime rendering, a marked-up plan, or a walk-through of similar completed work. You need to see how the light will look from the places where you actually sit, not only from inside the pool.
Choose the right fixture style, color, and control plan
The pool's finish affects the appearance of every light. White plaster, pebble finishes, blue tile, and darker interiors reflect and scatter light differently. A darker finish may produce a richer look but can appear less bright than a pale surface with the same fixture.
White lights create a clean, consistent appearance and work well when you want the pool to look calm and architectural. Color-changing fixtures offer more flexibility for parties or holidays, but they need simple controls. If the system requires a complicated sequence to select a color, people may stop using the feature.
Choose the control method before installation. Options may include a wall control, remote, mobile app, or integration with a broader pool automation system. A control system can coordinate lights with pumps and water features, but compatibility depends on the equipment and wiring. San Juan's pool upgrade and renovation services include automation options that can control pool lights and water features.
Keep the normal setting practical. A soft white or blue tone may work for everyday use, while color-changing modes can remain available for special occasions. The plan should also let you turn on only the spa, shelf, or feature lights when you don't need the entire pool illuminated.
Nicheless fixtures are a common option for new pools and some renovations. They sit in a smaller housing and can provide a lower-profile appearance. Traditional niche fixtures may suit certain pool structures and replacement situations. The choice depends on the existing wall, access, available parts, and the planned finish.
Before choosing a fixture, confirm:
- The light is rated for the intended pool or spa location.
- The color and beam pattern suit the interior finish.
- Replacement parts will remain accessible after installation.
- The controls can operate each desired lighting zone.
- The installation plan follows current electrical and pool safety requirements.
A lower-wattage fixture placed well can look better than a brighter fixture aimed toward the house.
Plan for Cape Coral weather and electrical safety
Southwest Florida lighting systems face heat, humidity, heavy rain, intense sun, and coastal air. The equipment needs protection from moisture, and exposed components should have materials and enclosures suited to the environment. Saltwater pools also require careful attention to the relationship between electrical systems, bonding, and pool equipment.
Pool lighting is not a good do-it-yourself electrical project. A licensed professional should handle the transformer, connections, grounding, bonding, GFCI protection, and other safety requirements. The builder and electrician should also verify current local code and permit requirements before work begins.
Location matters during design. Keep electrical equipment accessible for service, but avoid placing it where irrigation constantly sprays it or where floodwater can collect. An equipment area with good drainage and practical clearance makes future repairs easier.
Screen enclosures change the nighttime view. Dark framing and screen panels may absorb some light, while nearby palms, privacy walls, and landscaping can create shadows. Review the pool from inside the enclosure and from the main patio before selecting final brightness and fixture positions.
Lighting should also work during storms and power interruptions. Ask how the controls, transformer, and pool equipment will be protected, and make sure everyone in the household knows how to shut down the system when required.
A lighting plan should show the service locations as clearly as the decorative features. Access matters years after the pool is finished.
Existing pool? Plan lighting during the renovation
Replacing lights in an existing pool can improve the nighttime appearance without rebuilding the entire structure. The available options depend on the condition of the existing niches, conduit, junction boxes, and wiring. A professional should inspect those components before recommending replacement fixtures.
Surface-mounted or nicheless options may help when the original housing is damaged or difficult to match. They can also provide a practical upgrade when a homeowner wants better lighting without removing large sections of deck or tile. The final appearance depends on the fixture profile and its location.
Renovation is also the right time to address dark steps, a poorly lit spa, outdated controls, or a water feature that disappears after sunset. If the project includes new tile, coping, a tanning ledge, or a raised spa, coordinate lighting before those surfaces are installed.
You can review completed pool lighting and renovation projects to compare how different pool shapes, finishes, and features look after dark. Photos won't replace an on-site evaluation, but they can help you describe the style you want.
Avoid treating a light replacement as a simple bulb change until the system has been inspected. Older equipment may have corrosion, damaged seals, or wiring that needs attention. A new fixture won't solve an access or electrical problem hidden behind the finish.
Turn the design into a build-ready lighting schedule
Before construction starts, ask your pool contractor to document the lighting plan in a format you can review. It should identify each zone, fixture location, control method, transformer location, and relationship to nearby water features.
Use this short planning sequence:
- Mark the areas you use after dark, including swimming, spa seating, dining, and walking routes.
- Review the pool shape, interior finish, steps, shelves, benches, and raised features.
- Choose white or color-changing fixtures, then confirm the controls you want.
- Check fixture access, electrical protection, equipment placement, and current code requirements.
- Review the plan at night and make changes before tile, decking, or interior finish work begins.
During the final walkthrough, test each zone separately. Check the view from the house, the seating area, and inside the pool. Confirm that the lights are bright enough for safe movement without producing harsh glare.
A good schedule also records model information, installation dates, control settings, and service access. Keep that information with the rest of your pool equipment records.
Conclusion
Good LED pool lighting begins with decisions about use, sightlines, safety, and maintenance. Plan fixture locations before construction, separate underwater light from deck illumination, and treat the spa and water features as their own zones.
For an existing pool, inspect the electrical system and available housings before choosing replacement fixtures. When the layout, controls, and service access are planned together, your Cape Coral backyard will look inviting after sunset and remain practical for everyday use.