
Gunite Pool Pre-Pour Checklist for Southwest Florida
A gunite pool pre-pour checklist helps you confirm that the pool shell is ready for inspection before concrete is sprayed. This stage is one of the last chances to identify problems with excavation, steel, plumbing, drainage, or bonding while those components remain visible.
Southwest Florida conditions add extra concerns. Heavy rain, high groundwater, sandy soils, stormwater runoff, and local permitting requirements can affect the schedule and inspection process. Use this guide with your licensed pool contractor and local building department, because the approved plans and municipality determine the exact requirements.
Key Takeaways
- The pre-pour inspection usually happens after excavation, reinforcing steel, bonding, and main drain installation, but before concrete placement.
- Rebar must match the approved structural plans for size, spacing, laps, grade, and shell coverage.
- Plumbing lines need the pressure test required by the effective Florida Building Code edition and local inspection instructions.
- Bonding must connect required metal components to the pool's bonding system.
- Rainwater, groundwater, unstable soil, or standing water can delay the inspection or concrete placement.
- A passed inspection confirms visible work against the approved plans and code. It doesn't guarantee that every construction detail is correct.
What the Gunite Pool Pre-Pour Inspection Checks
The inspection may be called a steel, rebar, pool shell steel, or structural steel inspection. Names and inspection sequences vary by jurisdiction. Your permit card or inspection portal should show the designation used for your project.
Excavation, dimensions, and site readiness
The excavation should match the approved pool layout, including the pool shape, depths, steps, benches, spa, sunshelf, and equipment locations. The shell area should also be stable enough for the next construction stage.
Your contractor should resolve loose soil, unexpected voids, erosion, or changes caused by rain before requesting approval. If the excavation changed from the permitted design, the contractor may need direction from the designer, engineer, or building department before proceeding.
Check that the property has enough clearance for the approved pool location, especially near a home, seawall, retaining wall, easement, fence, or existing structure. A small field adjustment can affect setbacks, drainage, structural design, and permit compliance.
Rebar size, spacing, laps, and coverage
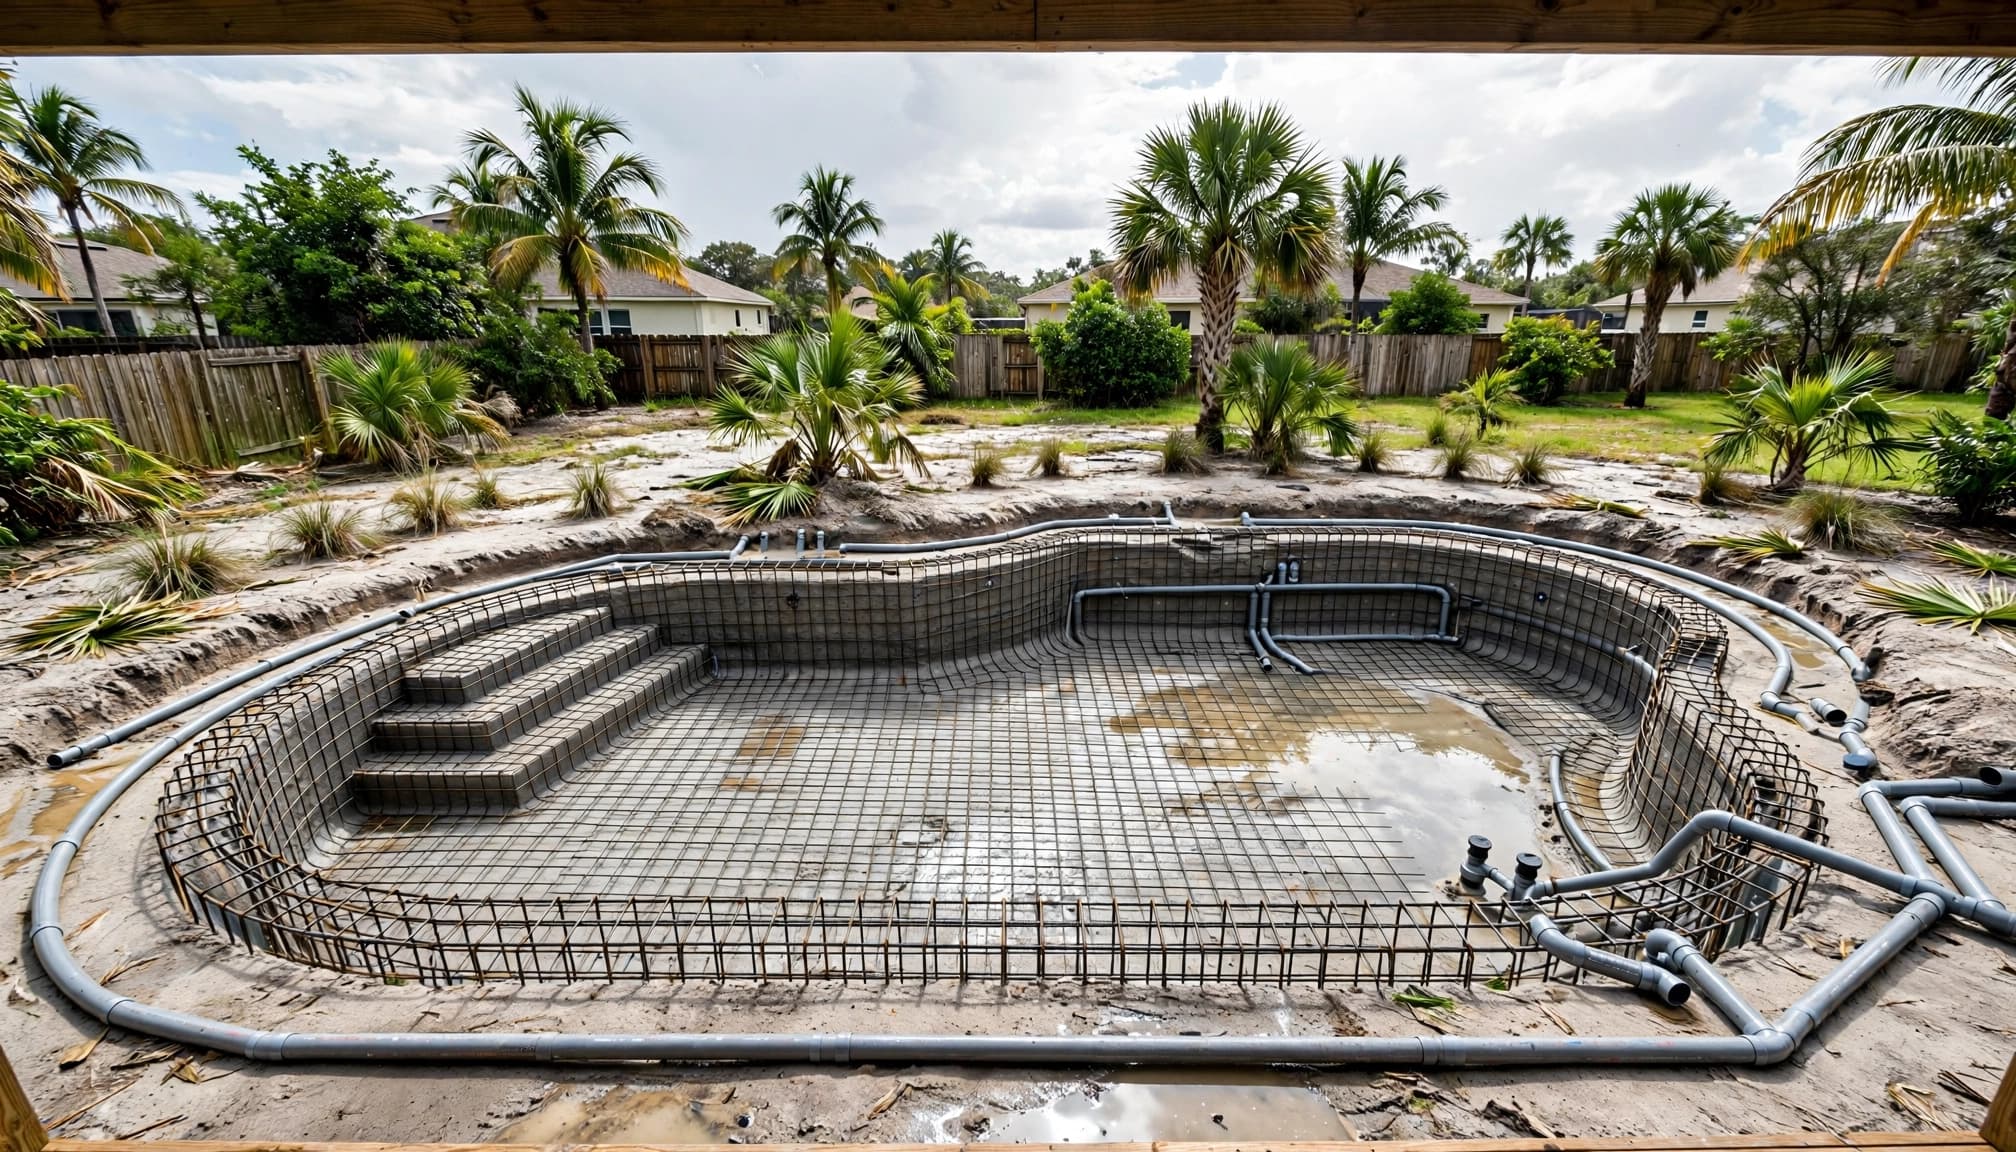
The reinforcing steel forms the framework for the concrete pool shell. Inspectors may check the bar size, grade, spacing, placement, laps, and distance from the finished shell surface.
Florida inspection guidance has included reinforcement laps of 40 times the bar diameter, but the approved structural plans and currently adopted code control your project. Homeowners shouldn't measure or alter the steel themselves. Ask the contractor to identify any locations that differ from the drawings and explain how they were resolved.
Rebar should remain secure and properly positioned during concrete placement. Steel that has shifted, rests incorrectly, or lacks the required shell coverage can affect structural performance and may require correction before the pour.
Main drain, plumbing, and pressure testing
The main drain, suction lines, return lines, water features, spa plumbing, autofill, overflow, and other underground pool piping should be installed according to the plans. Confirm that the planned features are accounted for before the steel and shell hide them.
Pressure testing is a code-sensitive item. Older Florida guidance described testing at least 35 psi for 15 minutes with air or water, while the Florida Building Code 9th Edition, 2026 analysis describes a change to 25 psi and removal of the air-pressure option. That difference matters.
Ask your contractor which code edition applies to your permit, what test medium the local authority accepts, and what pressure and duration appear in the inspection instructions. Don't rely on a generic statewide number or attempt the test yourself.
Bonding grid and nearby metal
Pool bonding helps reduce voltage differences between conductive components around the pool. The inspection may include the steel, metal fittings, lights, ladders, handrails, pumps, heaters, electrical equipment, and other bonded parts shown in the plans.
Older Florida guidance addressed metal within 5 feet of the pool's inside walls and metal up to 12 feet above maximum water level. Current requirements and exceptions can differ, including changes discussed in the 2026 code analysis.
Ask whether bonding is inspected with the steel or under a separate inspection. Confirm that the contractor has addressed nearby metal, screen enclosures, structural steel, deck reinforcement, and equipment connections where required by the approved plans.
Southwest Florida Drainage, Groundwater, and Weather Checks
A dry morning doesn't always mean the excavation is ready. Water can collect beneath the pool, enter from surrounding soil, or move across the property after a storm.
Rain, standing water, and soil stability
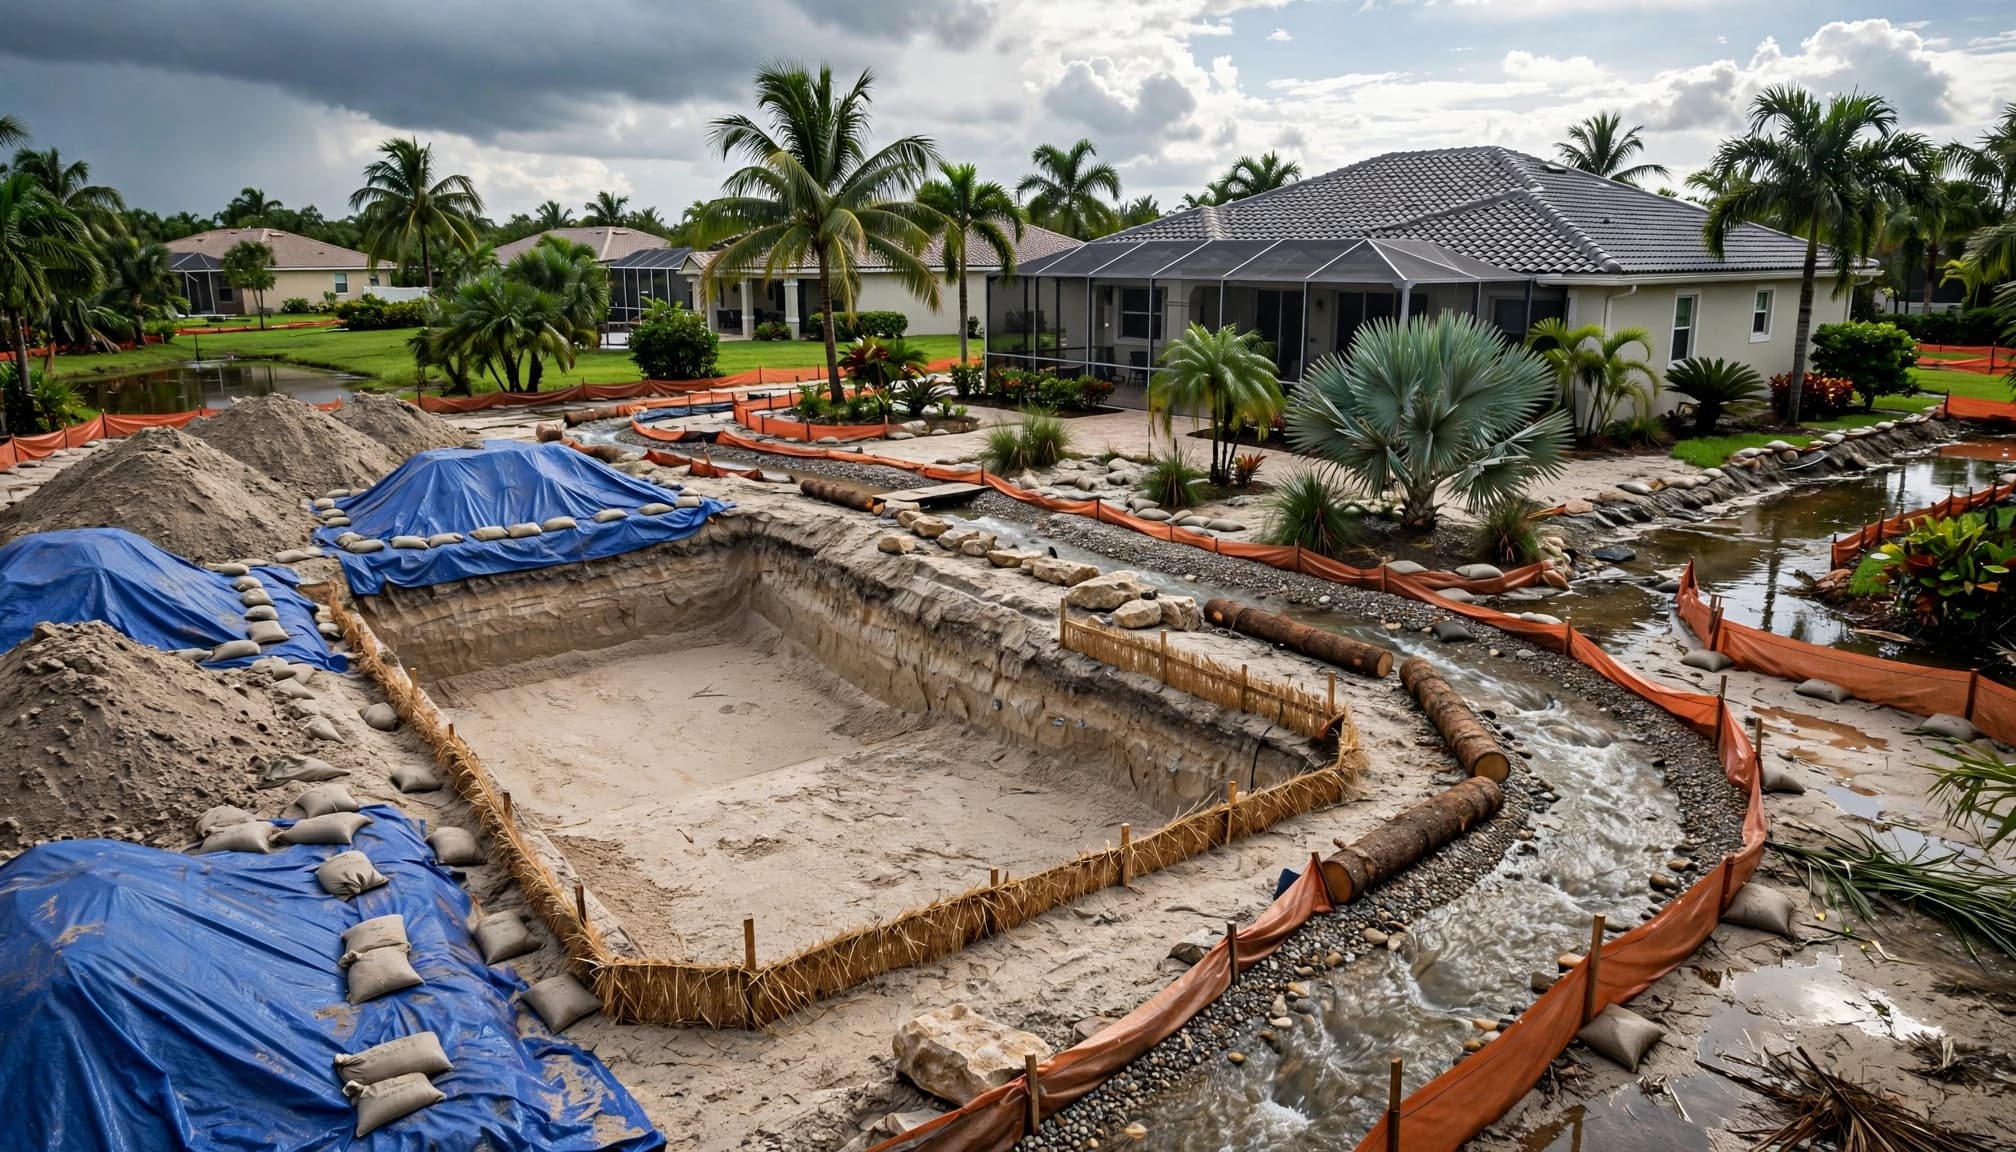
Southwest Florida rain can fill an excavation quickly and soften exposed soil. Groundwater may also rise into the pool area, particularly after prolonged rainfall or in neighborhoods with a high water table.
Before inspection, look for standing water, muddy soil, sloughing excavation walls, washed-out areas, and soil that has shifted around plumbing or steel. These conditions need professional evaluation before the shell is sprayed.
The contractor may need to manage groundwater or wait for better conditions. Homeowners shouldn't enter the excavation, operate pumps, move soil, or adjust construction components. Those tasks involve collapse, electrical, and contaminated-water hazards.
Temporary discharge and property protection
Water removed from the excavation needs a lawful and controlled discharge route. Unmanaged pumping can wash soil onto a sidewalk, street, neighboring lot, storm drain, or seawall area. It can also create erosion near the house or undermine nearby hardscape.
Ask where rainwater and groundwater will go during construction. Confirm that the route protects the home, landscaping, finished surfaces, neighboring properties, and public drainage areas.
When to pause and reschedule the pour
A delay may be the responsible choice when rain has changed the excavation, groundwater remains high, plumbing caps or test equipment are compromised, or the contractor cannot keep the site stable.
Concrete placement should follow inspection approval and the contractor's assessment of site conditions. Ask how the team will protect the excavation if storms are forecast and what happens if the inspection passes but weather changes before the scheduled pour.
Code and Permit Differences by Jurisdiction
Cape Coral, Fort Myers, Bonita Springs, Estero, Punta Gorda, Port Charlotte, and other Southwest Florida communities may use different inspection names, portals, procedures, or local requirements.
The pressure-test rule may depend on the code edition
The older 35-psi language still appears in some Florida pool inspection materials. However, the Florida Building Code 9th Edition, 2026 analysis describes a water-pressure test at 25 psi and deletes the air-test option.
That doesn't tell you which rule applies to your pool. The permit date, code edition, local building department, approved plans, and inspection instructions determine the applicable standard. Have your contractor confirm the requirement before the inspection is scheduled.
Lee County inspection timing matters
Lee County's pool permit application states that a permit can become void if the first inspection doesn't occur within six months of issuance, or if no inspection occurs for six months after the last passed inspection.
That deadline is separate from the technical pre-pour checklist, but it can affect a project delayed by weather, design changes, or construction scheduling. Keep the permit information available and ask your contractor how inspection activity will be documented.
Review the permit card and approved plans
Before the inspection, request a copy of the approved pool plan, structural details, inspection schedule, and any revisions. Confirm that the pool being built matches the permitted design.
Pay attention to features that are easy to overlook, such as a spa spillway, raised beam, deck jets, bubblers, fire features, waterline equipment, or an oversized sunshelf. Changes made after approval may require a formal revision or building department direction.
Homeowner Walkthrough Before Concrete Is Sprayed
Use this checklist during a contractor walkthrough. It is for questions and visual confirmation, not for performing regulated construction work.
- The permit is active, posted or available as required, and assigned to the correct property.
- The approved pool shape, depths, spa, steps, benches, and water features match the excavation.
- Setbacks and clearances have been reviewed against the approved plan.
- The excavation has no unresolved erosion, loose soil, unexpected voids, or standing water.
- The contractor has a plan for rainwater and groundwater during the remaining work.
- Rebar placement matches the approved structural drawings.
- Steel is secure and has not shifted around drains, steps, benches, or plumbing.
- Plumbing lines and fittings match the permitted pool and equipment design.
- The required plumbing pressure test has been completed and documented.
- Main drain installation and drain piping have been reviewed.
- Bonding connections have been installed where required.
- Nearby metal, screen enclosure components, handrails, lights, and equipment have been addressed.
- The inspection has been requested under the correct local inspection type.
- The contractor will wait for approval before spraying the shell.
- Any failed or incomplete item has a documented correction plan.
A photo record can help you track progress, but photographs don't replace an inspection or contractor documentation. Keep copies of approvals, test results, plan revisions, and written decisions from the building department.
Where the Pre-Pour Inspection Fits
The pre-pour inspection comes after excavation and form-and-steel work, but before the gunite or shotcrete shell hides the structural and plumbing components. The next steps may include shell curing, backfill, plumbing connections, deck preparation, tile, equipment, electrical work, and interior finish.
San Juan Pools & Spas describes its construction sequence in its custom pool construction process, including design, engineering and permits, excavation, steel, concrete, backfill, plumbing, deck work, equipment, and finish stages.
The exact order can change when a project includes unusual soil, a seawall, a retaining wall, a raised spa, difficult access, or a revision to the approved plans. Ask which work is complete, which inspection is pending, and what must remain accessible after approval.
Questions to Ask Before the Shell Pour
Use these questions with your pool builder before the inspection appointment:
- Which local inspection name applies to this stage of my permit?
- Has the building department approved the current pool plan and any revisions?
- Which Florida Building Code edition applies to this permit?
- What plumbing pressure, test medium, and test duration does the local authority require?
- Has the plumbing test been documented, and who will provide the record?
- Is bonding inspected with the steel, separately, or through another process?
- Which metal components near the pool must be bonded on this project?
- Has the excavation changed because of rain, groundwater, soil movement, or field conditions?
- How will stormwater and groundwater be controlled before and during the pour?
- What conditions would cause you to postpone the concrete placement?
- Who requests the inspection, and how will the approval be recorded?
- What happens if the inspector requires a correction before the shell pour?
- Are the pool depth, benches, steps, spa, sunshelf, drains, and water features built to the approved plan?
- Can I review the final inspection result before concrete is sprayed?
For examples of completed local work, review these Southwest Florida pool projects and ask how similar sites were prepared for excavation, steel, drainage, and shell construction.
FAQ About Gunite Pool Pre-Pour Inspections
Can rain delay a gunite pool inspection?
Yes. Rain can cause standing water, soil movement, erosion, groundwater intrusion, or unstable excavation conditions. Your contractor and building department determine whether the site is ready.
Does a passed inspection guarantee a strong pool shell?
No. The inspection verifies visible work against the applicable code and approved plans. Proper concrete placement, material quality, curing, workmanship, and later construction steps still matter.
Should homeowners perform the pressure test?
No. Pressure testing involves equipment and code requirements that should be handled and documented by the licensed contractor or qualified trade professional. Ask for the result and the applicable standard instead.
Is 35 psi the current Florida requirement?
Not universally. Older guidance described 35 psi for 15 minutes, while the 2026 Florida code analysis describes 25 psi and removes the air-test option. Confirm the rule for your permit with the contractor and local building department.
Conclusion
A careful pre-pour review protects more than the inspection appointment. It gives you a final opportunity to confirm the excavation, rebar, plumbing, bonding, drainage plan, and permitted design before concrete covers the work.
For a Southwest Florida pool, weather and groundwater deserve the same attention as steel and plumbing. Keep the approved plans available, ask direct questions, and let your licensed contractor and local building department confirm when the shell is ready.